
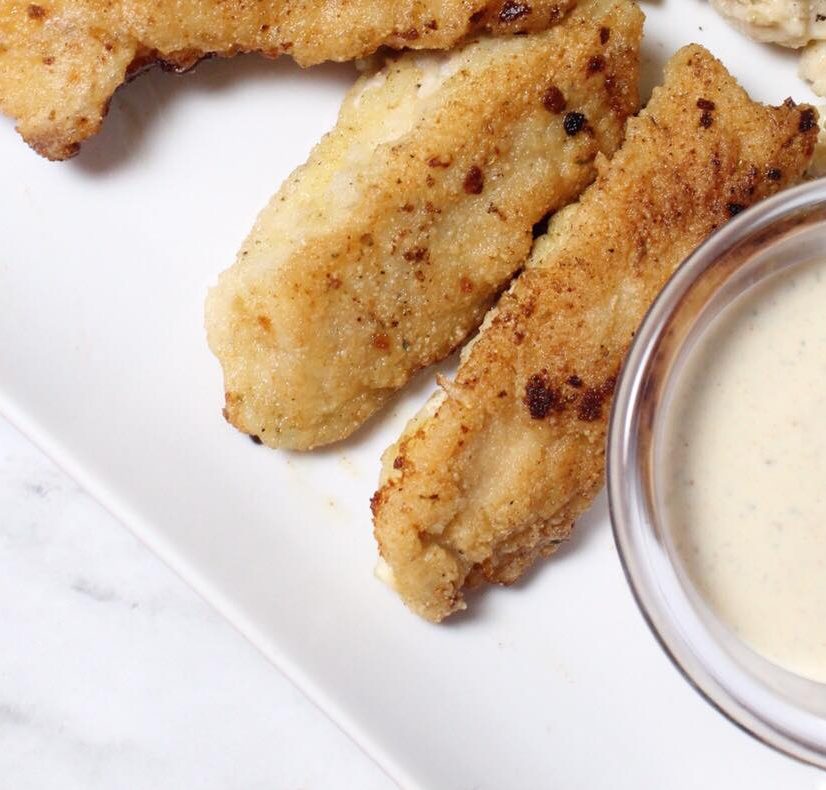
Breaded Chicken Cutlets/Tenders (Gluten/Grain Free)
Course


Chicken tenders…for kids young and old! They just never get old! These cutlets are wonderful served over creamy pasta, cauliflower rice and gravy, or make them into tenders and dip them in some good ol’ RANCH! You can’t go wrong. Totally kid-approved!
These are made with a combination of gluten free flours and spices that make the crust, crispy and flavorful! Don’t let fried chicken intimidate you. These are a great way to try it out! They’re super simple to bread and fry – you’ll impress yourself! 😉

| Prep Time | 5 minutes |
| Cook Time | 20-25 minutes |
| Servings |
cutlets
|
Ingredients
- 2 lbs Chicken breast
- 1/2 cup Arrowroot powder 1/4 c separated
- 1/4 cup Coconut oil for frying - sub avocado oil
- 1/3 cup Almond Flour
- 2 tbsp Tapioca flour
- 2 tbsp Coconut flour
- 1 Egg
- 1 tbsp Water
- 1 tsp Onion powder
- 1 tsp Garlic powder
- 1 tsp Pink salt
- 1/2 tsp Black pepper
- 2 tbsp Dried minced onion optional
- 1 tsp Thyme leaves optional
- 1 tsp Oregano optional
Ingredients
|
|
Instructions
- In a medium sized bowl (big enough to toss chicken pieces in), beat the egg and water. Set aside.
- In a shallow bowl or plate, add 1/4 cup of arrowroot powder.
- In a large bowl, mix together remaining ingredients (except for the chicken breasts).
- On a cutting board, slice each chicken breast into 2-3 thin slices. (about 1/4-1/2 inch thick) You do this by placing the chicken breast, flat on the board, and laying your hand on top. Hold your knife sideway (parallel to your hand and the board), and cut into the breast. Eyeball it and cut 1/4 inch above the cutting board, leaving a thin chicken slice. I typically can do this 1-2 more times with each breast. It just depends on the thickness.
- You can also make tenders, by simply cutting the breast into long chunks. Cooking times may vary with the thickness of the chicken pieces.
- In a large, deep cast iron skillet (you could use a good, nonstick or heavy bottom pan/pot), heat oil over medium high heat. (it should take about 4-5 minutes to heat up)
- Dip each piece of chicken in arrowroot powder, being sure to evenly coat all sides. Use a fork or your fingers! You might get a little messy! (It's worth it though!)
- Follow by dipping each piece of chicken into egg mixture.
- Finally, coat all sides of each piece with the seasoned flour mixture, being sure to pat the mixture onto the chicken.
- Gently shake off excess flour and place each chicken cutlet into hot oil. Make sure it sizzles when you place it in there. That helps to get a nice crust on the chicken! (Do not over crowd the pan. I usually fit about 3 pieces at a time.)
- Cook for 4-5 minutes or until the edges begin to turn golden brown and flip. You should easily be able to flip the chicken when it's done on the first side. If it sticks, do not flip, and cook for another minute or so.

- Cook the chicken pieces for 3-4 min on the other side. The thinner you slice the chicken, the quicker it will cook! Usually, when both sides are evenly browned, it's done.
- Repeat steps 7-12 until all of the chicken is cooked.
- I like to keep the chicken cutlets/tender warm by placing them on a baking rack on top of a baking sheet in a 250 degree oven. It keeps them nice and crispy until you're done cooking them all!
- Serve over pasta or rice, or with some Ranch or BBQ sauce! 🙂
Reviews
There are no reviews yet.